1. What is TokenHub?
- TokenHub is a playground where you can create your own token with just a few clicks, and then freely try out every feature of the Defi world.
2. Why TokenHub?
- Since the Bitcoin halving in 2020, the DeFi space has continuously grown and is well developed in the diversity of products and user base. The Total Value Locked on all DeFi products once even peaked at $250 billion. This proves that the need for DeFi is increasing every day, but most people only recognize the risks of DeFi after losing actual money to it. This is the motivation for the creation of TokenHub. TokenHub team’s mission is to help DeFi users to get hands-on experience with many fields of DeFi like yield farming, and swapping of tokens, … without the cost of their actual money. By using TokenHub, users can learn a lot about DeFi without taking the risk of losing money, exclusively on NEAR testnet.
3. TokenHub Guide: How to create your own token on TokenHub
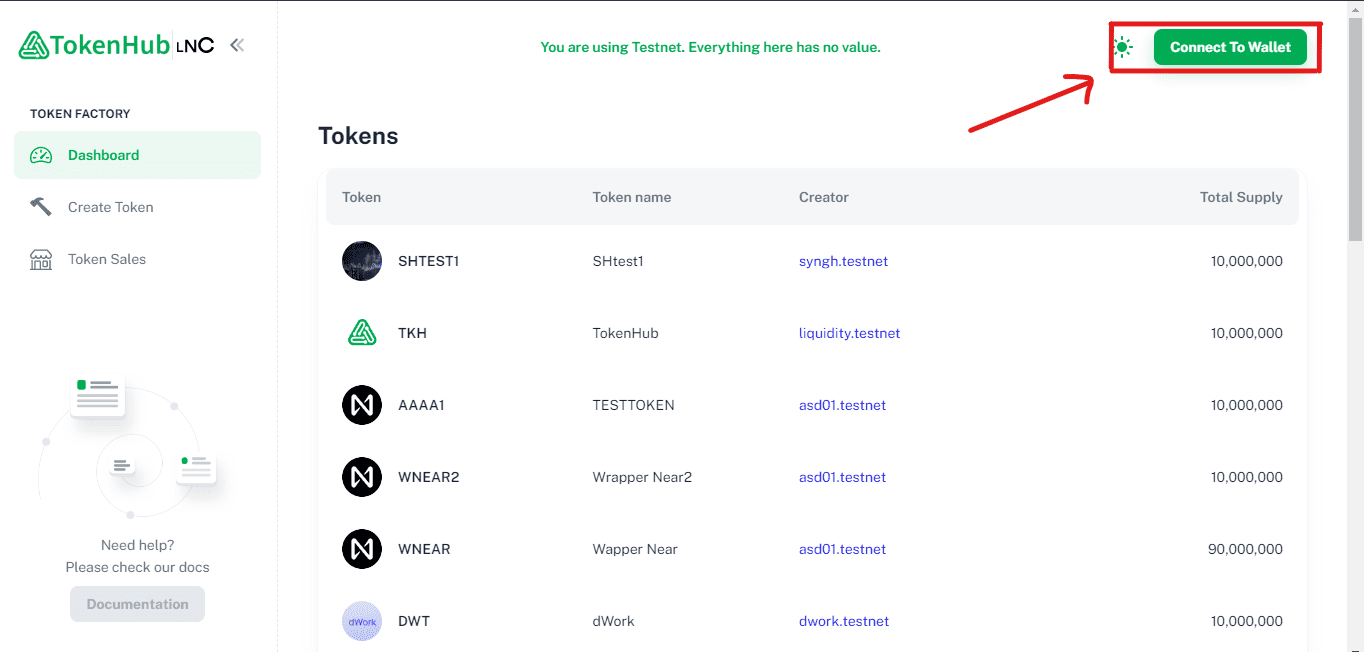
Step 1: Connect your NEAR testnet account to TokenHub
If you don’t have a NEAR testnet account, please follow the official guide.
Go to https://app.tokenhub.tk/token/create and click “Connect To Wallet”:
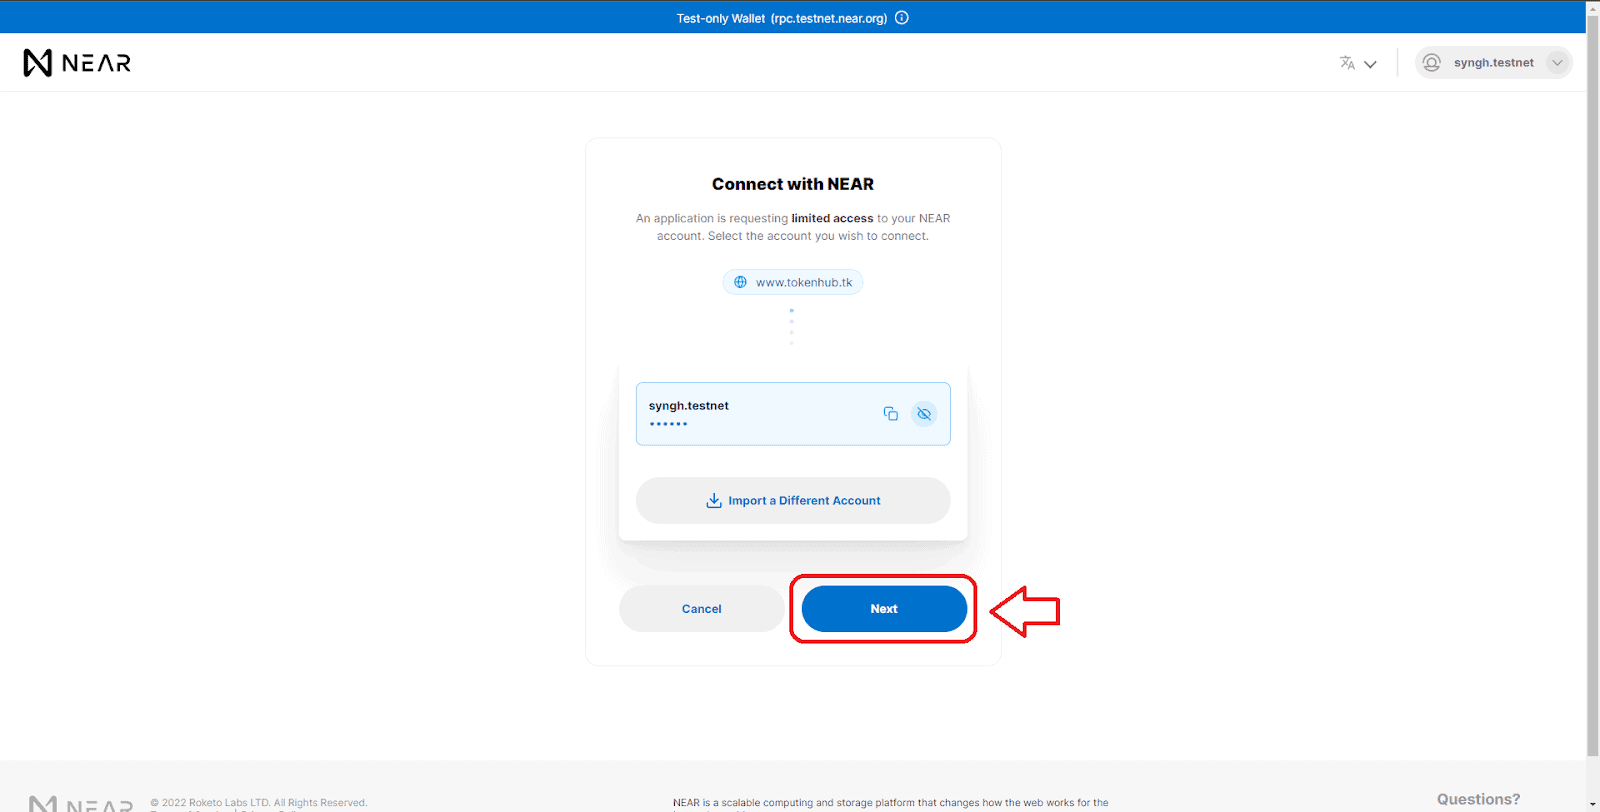
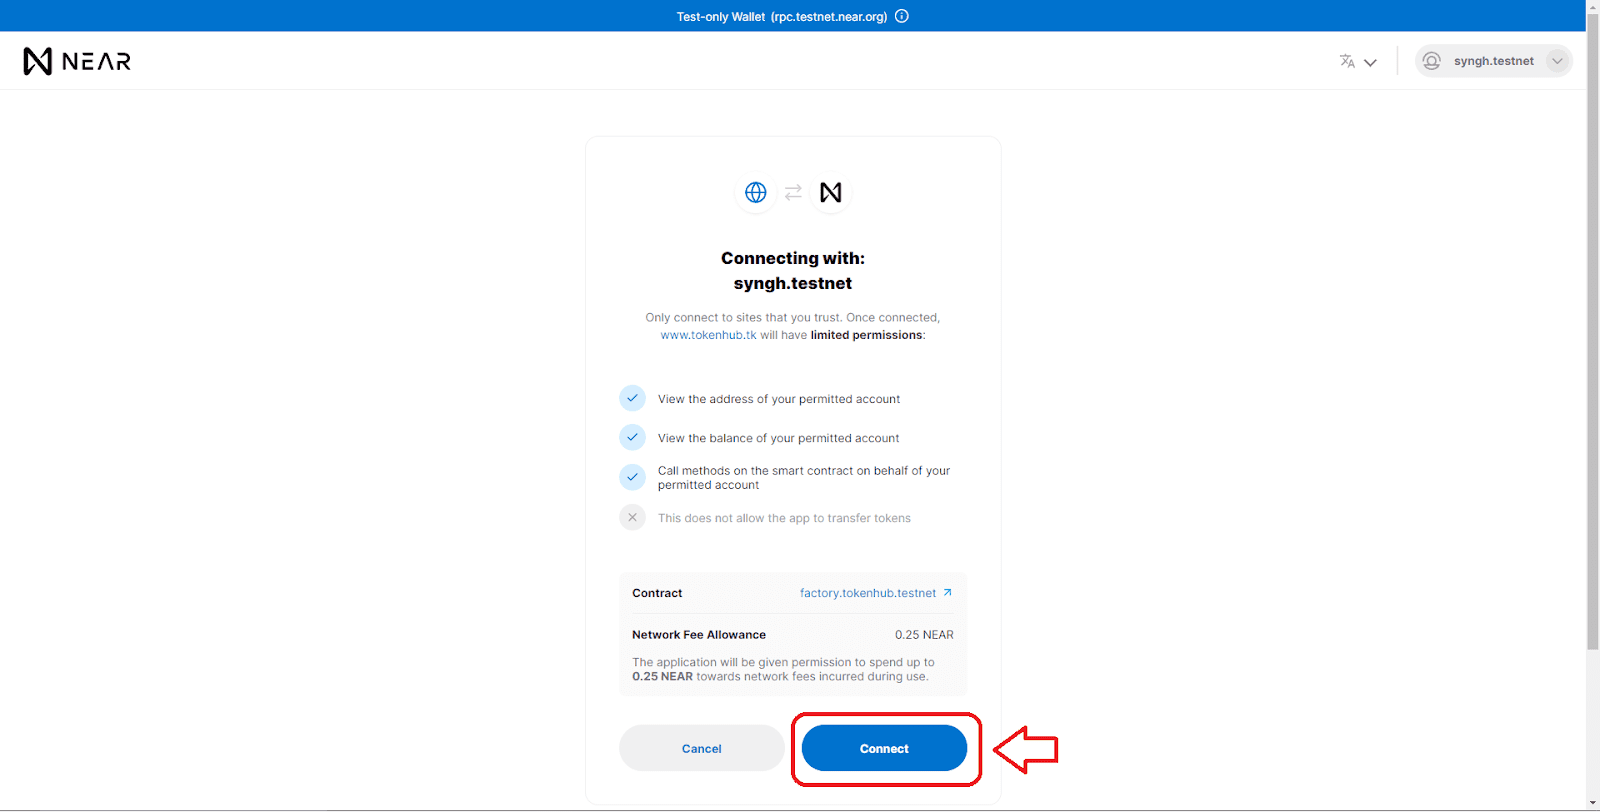
Once you are redirected to this site, click “Next”:
Then click “Connect”:
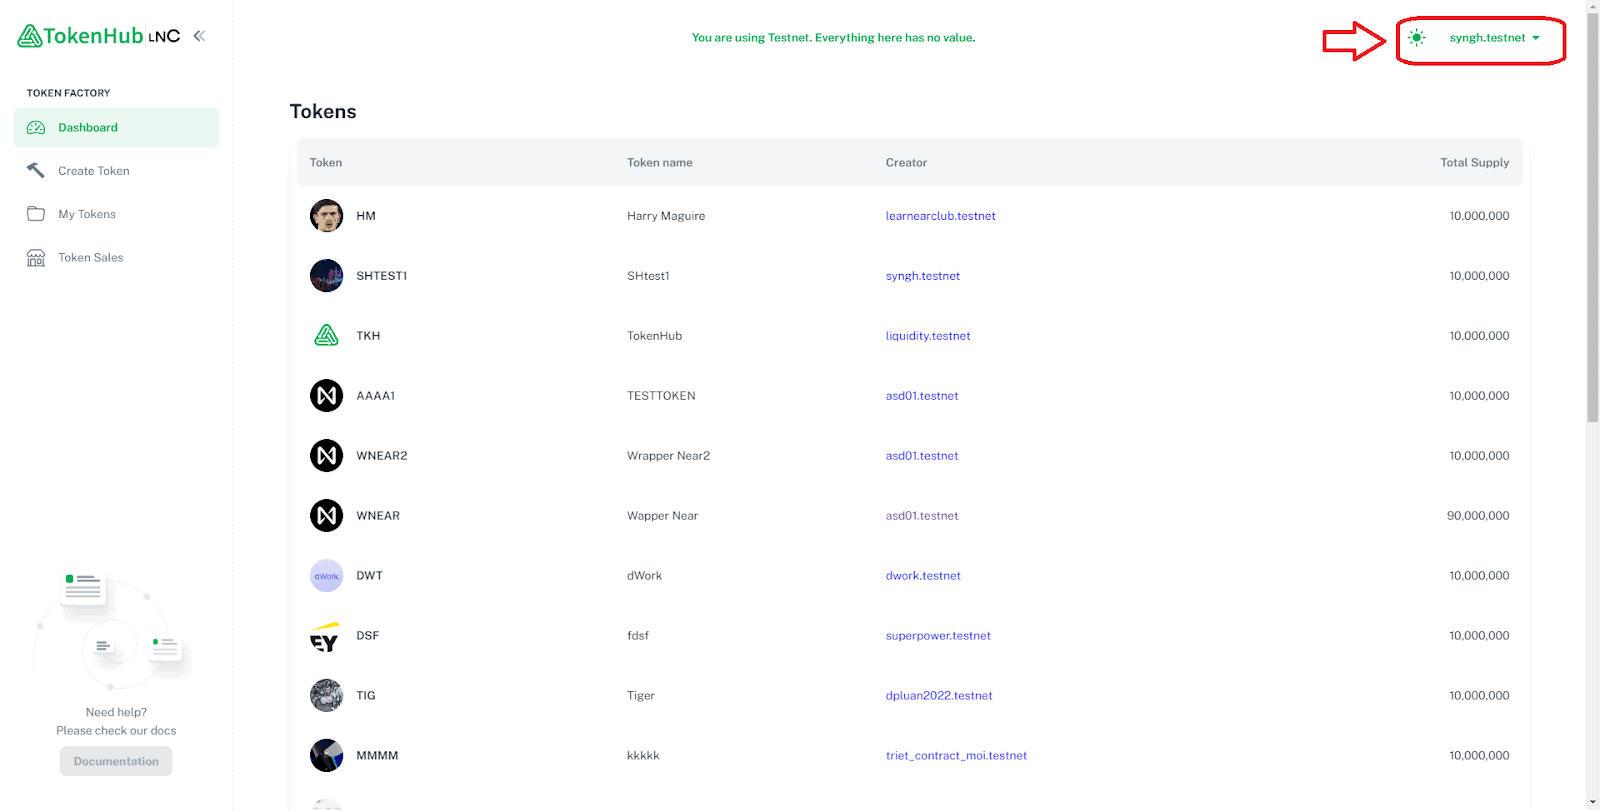
Your account is now connected to TokenHub:
Step 2: Go to https://app.tokenhub.tk/token/create or click the “Create Token” button on the left panel of TokenHub website:
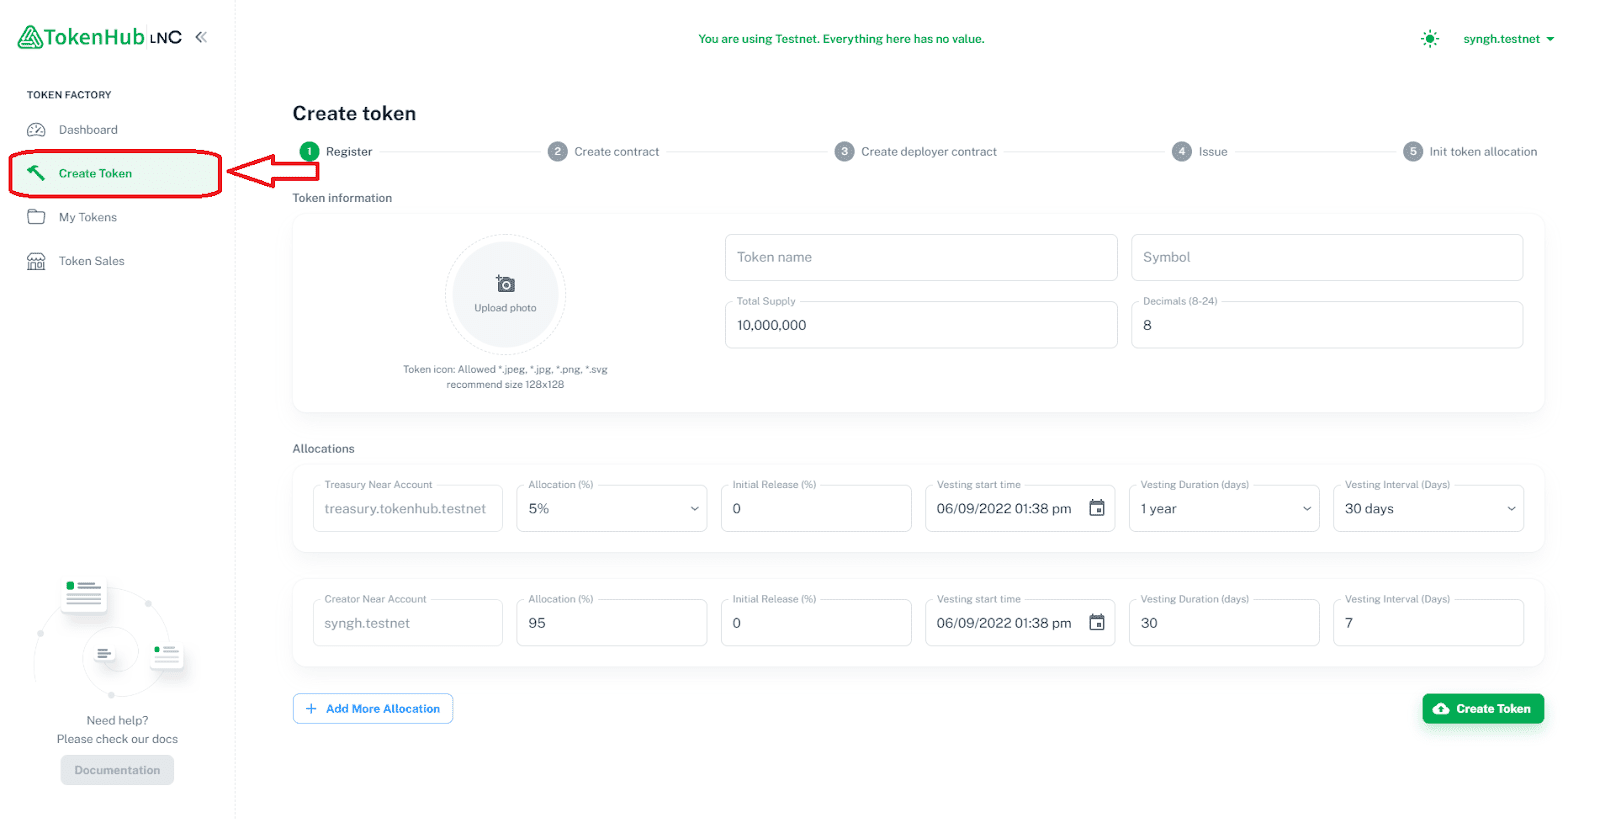
Step 3: Fill in your desired token information
This includes the name of your token, its symbol, its total supply, and its decimal value (from 8 to 24). In this example, I will create a token named “Bitcoin” and have the symbol “BTC”, its total supply will be 21,000,000 tokens and a decimal value of 8.

A simple explanation of decimal value is the number of digits that comes after the decimal point. For example, my Bitcoin token has a decimal value of 8, so an arbitrary account could have 1.12345678 BTC or 49.37603856 BTC, and the total supply of my BTC token will be 21,000,000.00000000. The higher the decimal value is, the more divisible your token will be.
Step 4: Configure the allocation of your token
Step 4.1: Set up the allocation accounts
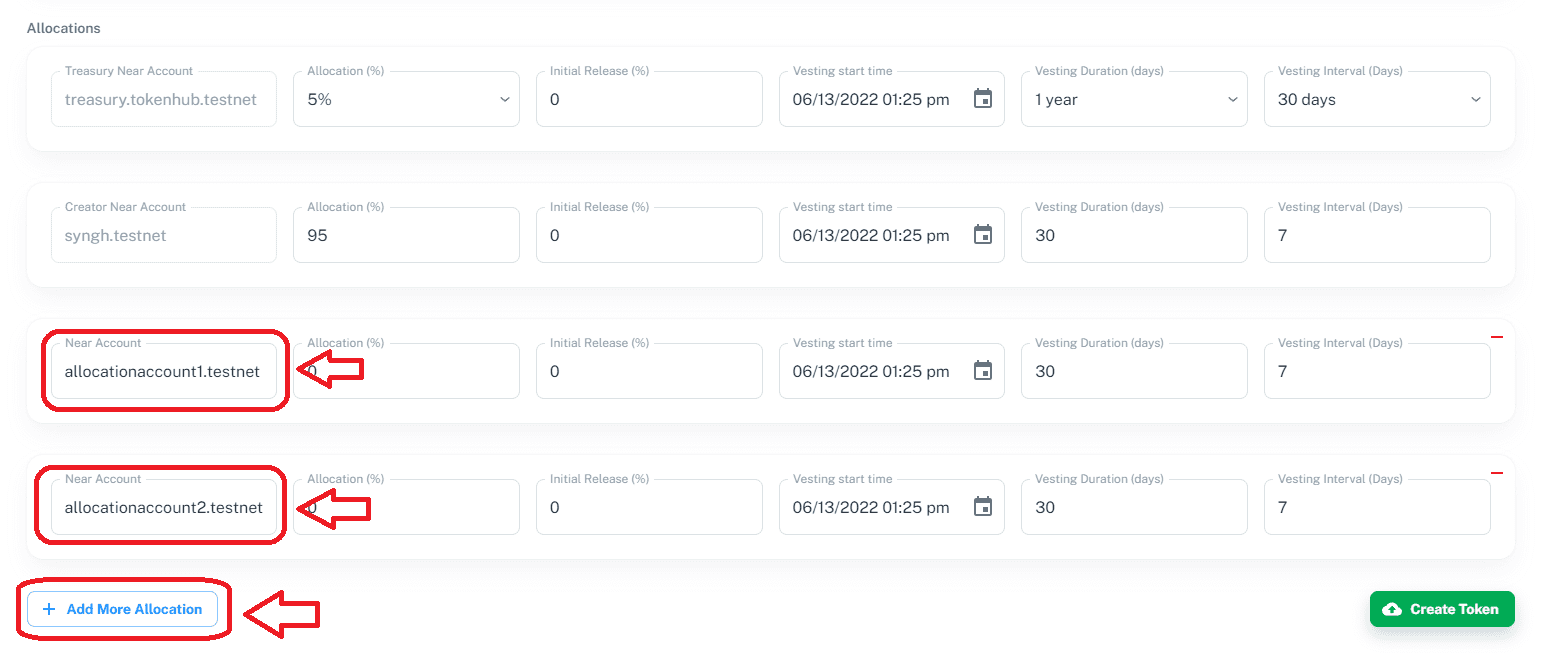
Two default accounts will receive a portion of the token total supply: TokenHub’s treasury account (treasury.tokenhub.testnet), and the account that you have connected to TokenHub. To add more accounts that can receive a portion of your total token supply, click “Add More Allocation” and then fill in the address of those accounts, note that the accounts that you add have to be NEAR testnet accounts, which are accounts that end with “.testnet”, not “.near”:
My BTC token will only allocate to the two default accounts:
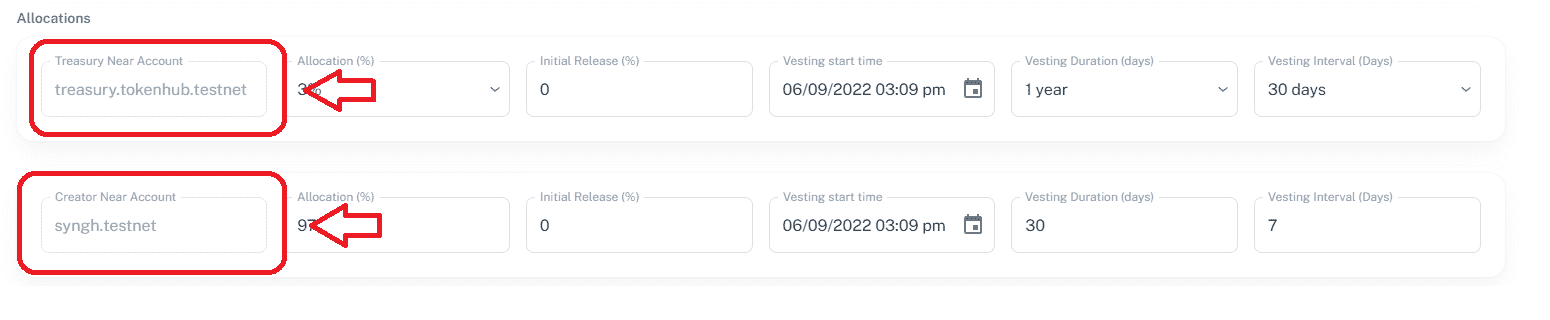
The default accounts that your token will be allocated to are the TokenHub’s treasury and you are connected NEAR testnet wallet.
Step 4.2: Determine the token allocation for each account
Fill in how much of your total supply (in %) will be given to each account in the “Allocation(%)” box. The amount that the treasury account will get has three options to choose from 3, 5, or 7%. Remember that no matter how many accounts your tokens will be allocated to, the total allocation(%) of all accounts has to be 100%. My BTC token will give TokenHub’s treasury 3% (630,000 BTC), and the rest 97% will be sent to my account:

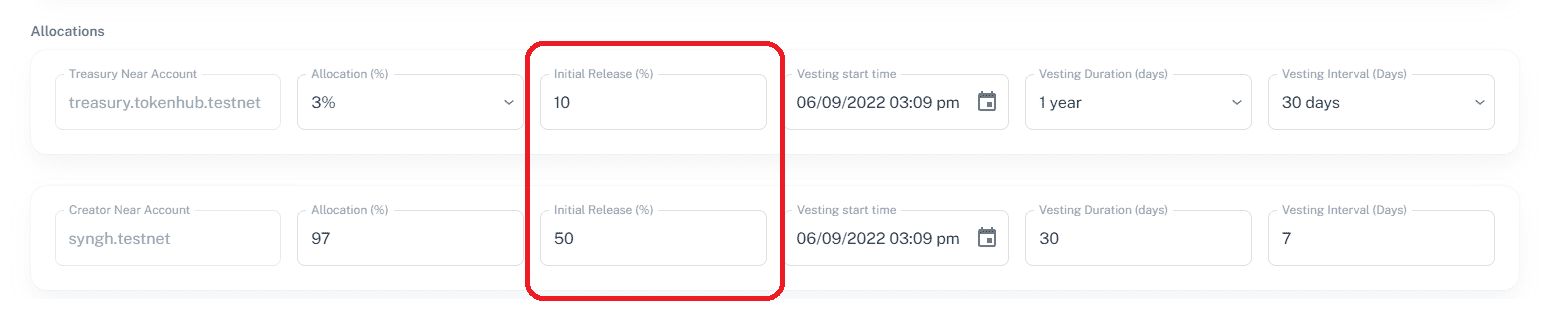
Step 4.3: Set initial release for each account
Determine how much (from 0 to 100%) of the allocation that you’ve set in Step 4.2 that will be immediately sent to each account once you have created your token. In this example, the treasury will instantly receive 10% of 3% of 21,000,000 total supply of BTC, which is 63,000 BTC. As for my account, it is 50% of 97% of 21,000,000 BTC, which is 10,185,000 BTC.
You might be wondering, “How will the rest of the token be released?”. This is where the vesting parameters come in.
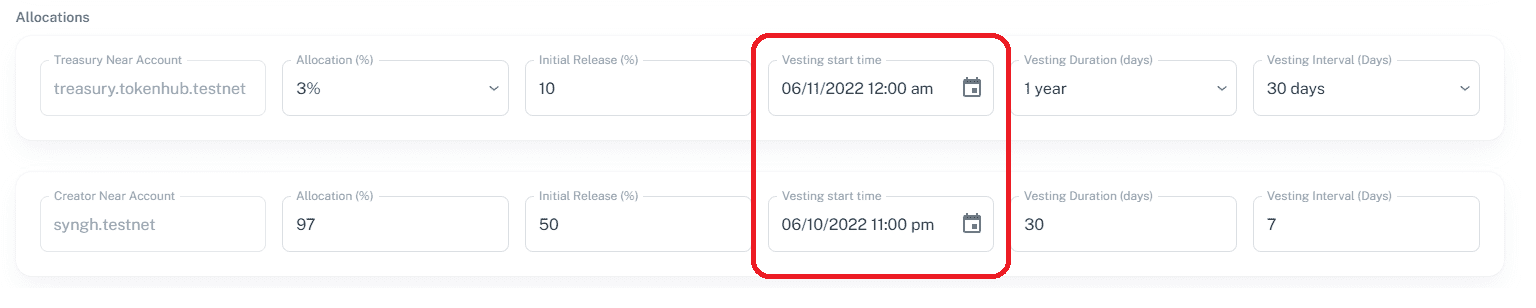
Step 4.4: Configure vesting parameters
Vesting is the gradual and periodical release of tokens to the designated accounts. In this example, it means that the remaining tokens that aren’t initially released will be locked after creation and will be released at selected intervals in the future. At TokenHub, you can configure 3 parameters for your token vesting: The start date, the vesting duration, and the vesting interval.
The vesting start date determines when the releasing process of your token starts. You can configure this date individually for each allocation account.
Next, set the vesting duration for each account. The vesting duration is how long it will take to completely release the tokens. For TokenHub’s treasury account, there are 3 options to choose from 1, 2, or 3 years. As for other accounts, you can fill in any duration (in days) that you want. In this example, the vesting for the treasury will complete its releasing of tokens in 1 year. For my account, it will be completed in 30 days.
Finally, set the vesting intervals (in days) for each account. The vesting interval is the period between each release. For example, a vesting duration of 30 days and an interval of 10 days would mean that the tokens will be divided into 3 equal parts, and each part will be released every 10 days. For the treasury account, there are also 3 options: 30, 90, or 180 days. For other accounts, you can choose any duration.

Other than the two allocation accounts, you cannot add any other accounts that can receive your token.
Step 5: Create your token
Once you have completed all the steps above, click “Create Token”
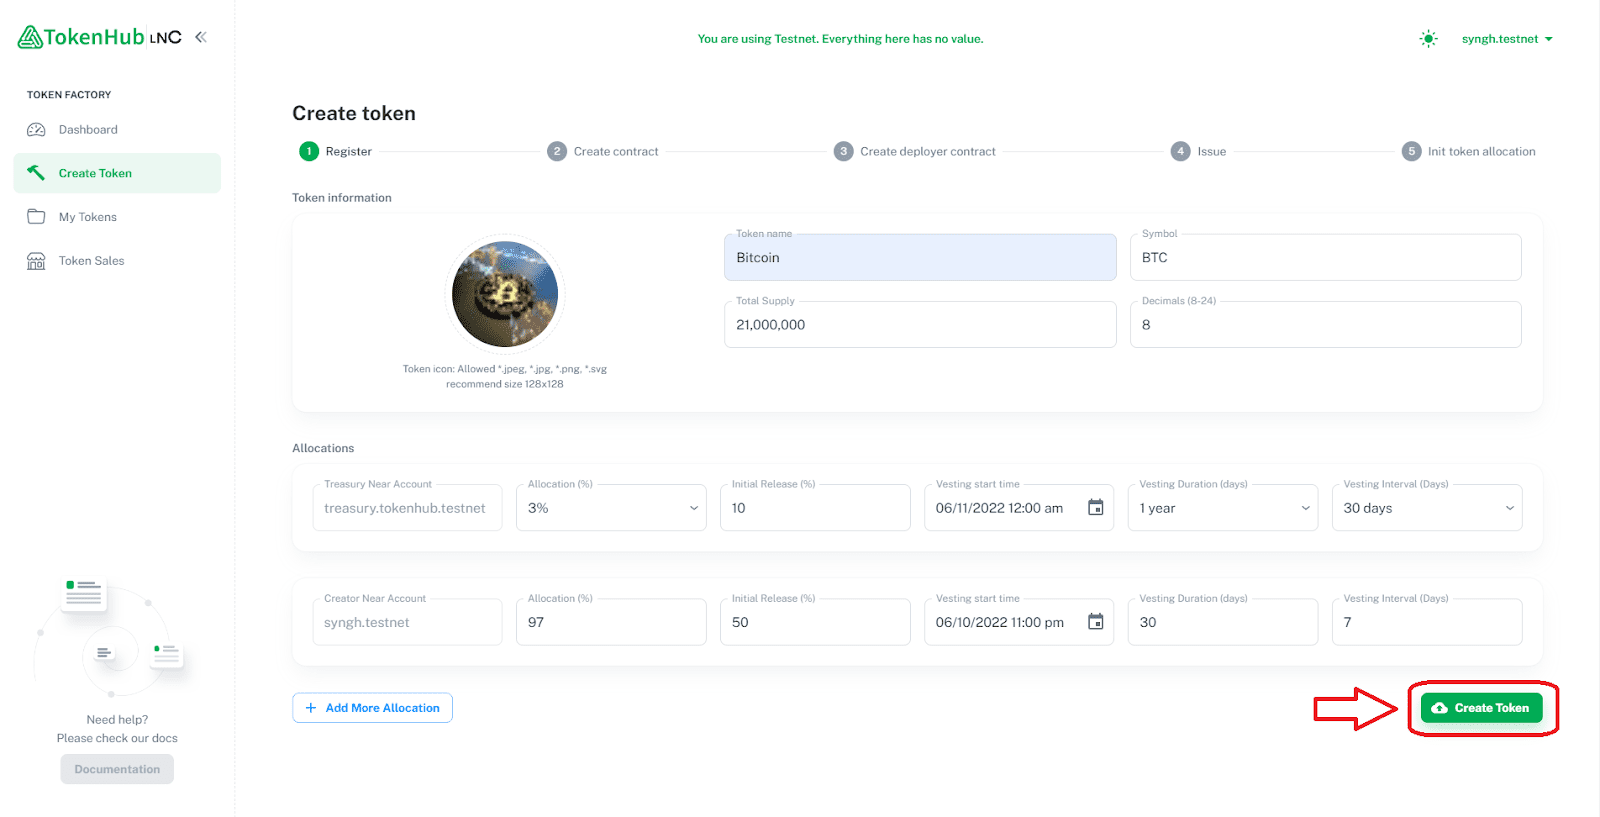
After a while, you will be redirected to the “My Token” tab which includes all your created tokens.
Guide: Launch your token sale
To launch your token sale on TokenHub, please fill out this form: https://forms.gle/vgagVRQpKrEQJ8D86
Then contact Harry – TokenHub founder via:
- Discord: harrynguyen#0629
- Telegram: @harrynguyen0991
So that we can help you with setting up your token sale contract according to your sale registration. We will inform you about the contract address so you will have to send enough tokens to that contract. Finally, we will put it on the TokenHub website to begin promotion. Then all you have to do is wait and your sale will be up and running.Fundamentally, you need to decide how many tokens are allocated for sale and what is the timeline. It’s totally up to you but the sale shouldn’t last too long. The LNC token sale lasted 3 days including 2 days of the sale and 1 day of grace which can be a good reference for you. Refer to LNC Token Sale for details.